A low-pitch re-roof in Sunbury-on-Thames — and why we were the only company that wouldn't just re-tile it.
The problem. The property is a riverside home in Sunbury-on-Thames with a roof pitched between 9 and 10 degrees in places. The client had it quoted by several roofing companies. Most offered the same thing: strip it, felt and batten it, put the tiles back on. We wouldn't do that, and here's why.
There isn't a roof tile on the UK market rated to work below 10 degrees. Not one. Every manufacturer sets a minimum pitch, and below it the tile laps simply cannot resist wind-driven rain — water tracks back up the roof under the laps and finds the timber. It might take a year. It might take five. But it will happen, and when it does the whole covering is at fault, so nobody can tell you where the leak is coming from.
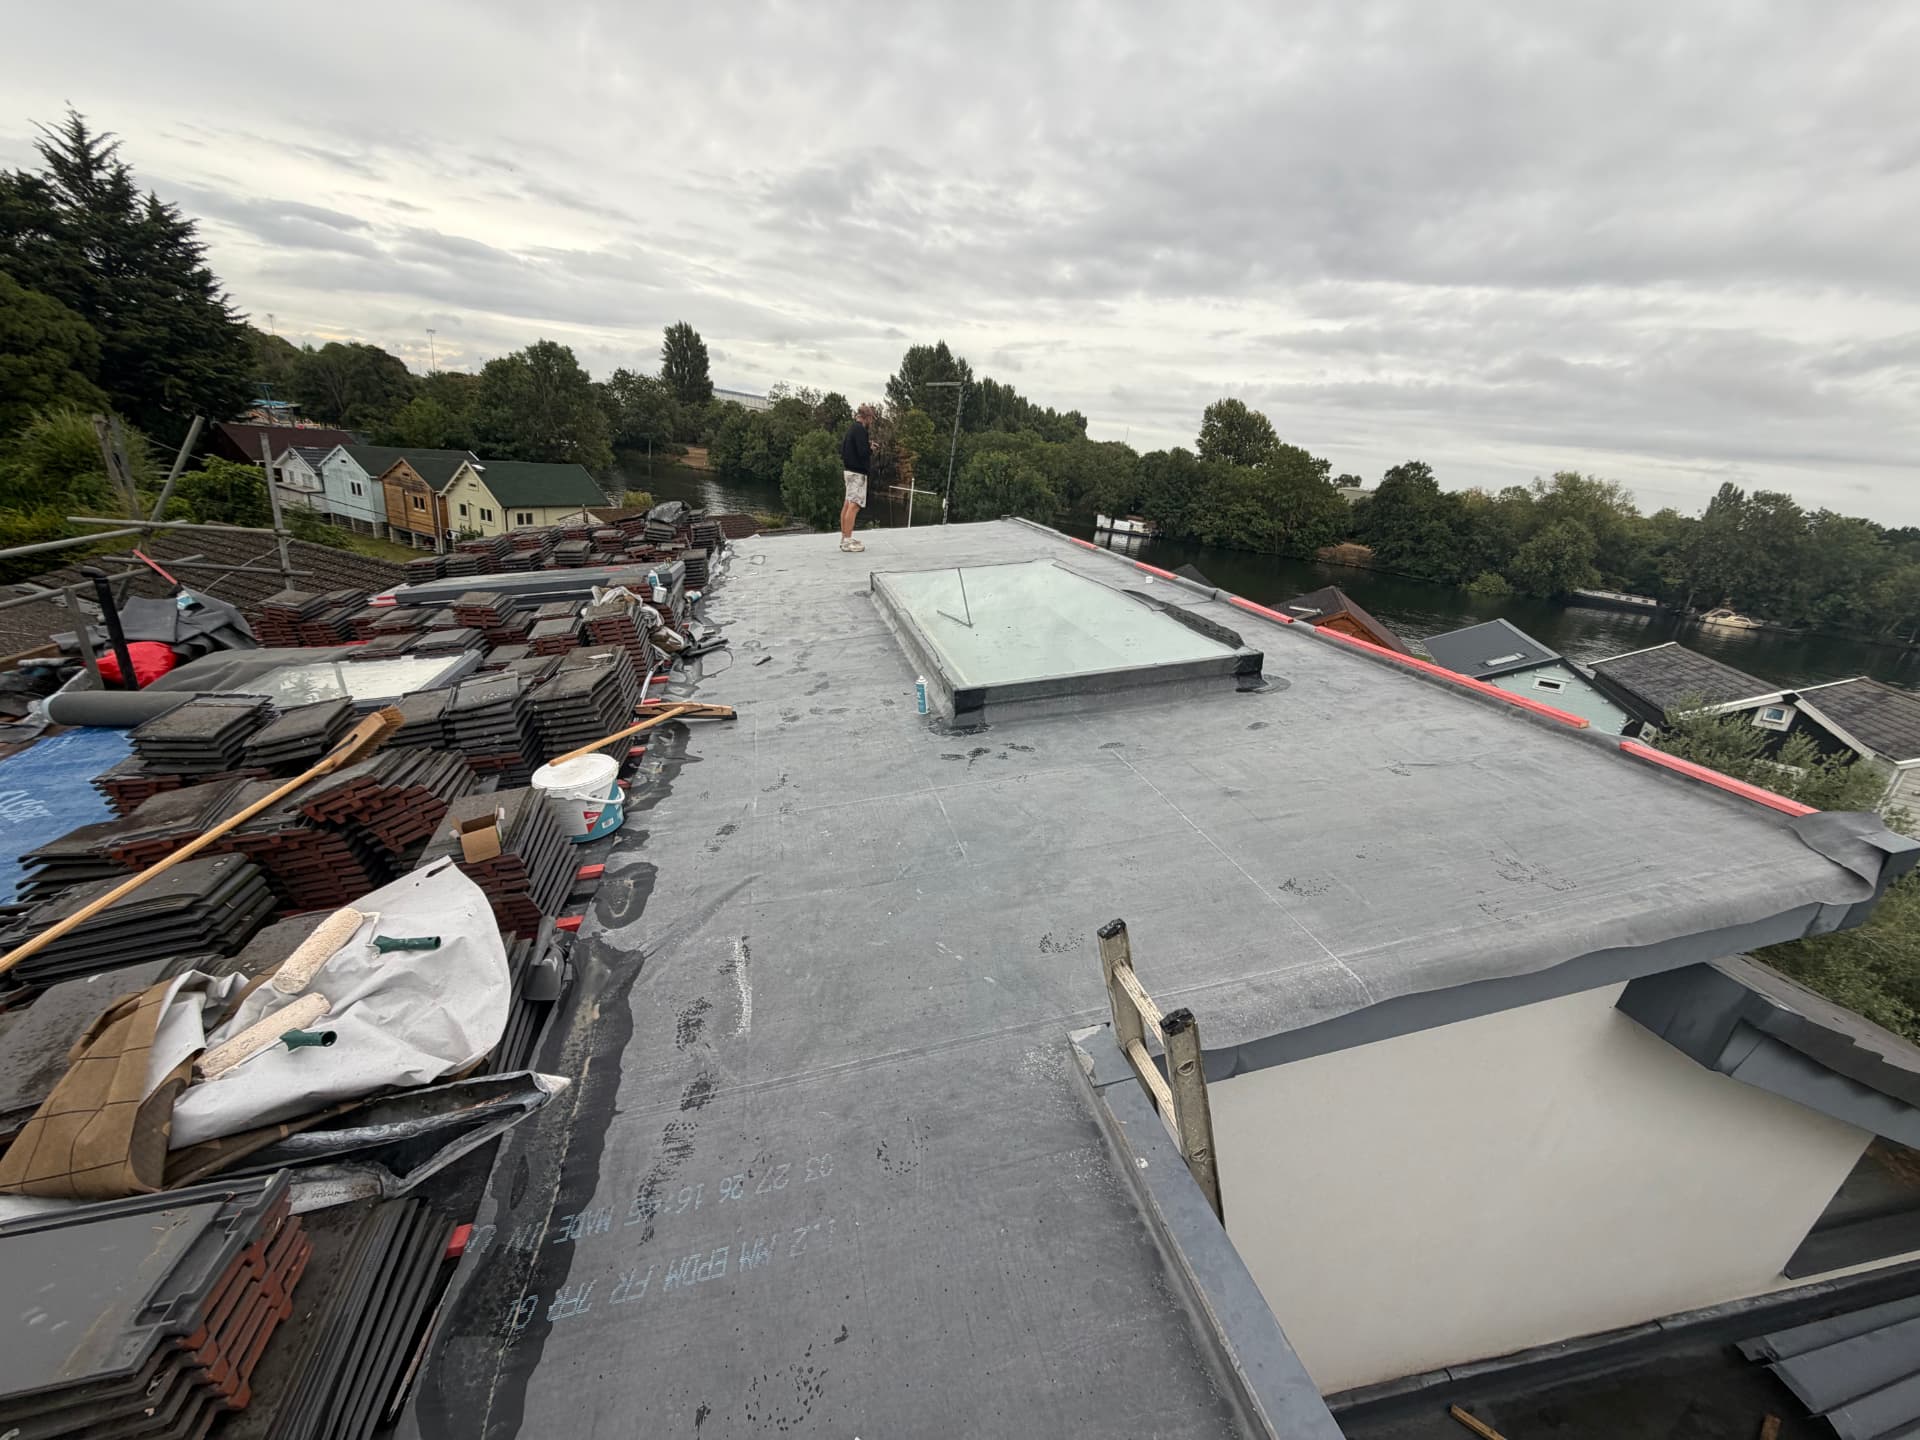
Putting our name on a tiled roof at 9 degrees with nothing underneath it isn't something we're prepared to do. So we specified a different job entirely: a fully waterproof EPDM flat roof beneath the tiles. The rubber is the roof. The tiles are a weathering and aesthetic layer on top. If every tile blew off tomorrow, the building stays dry.
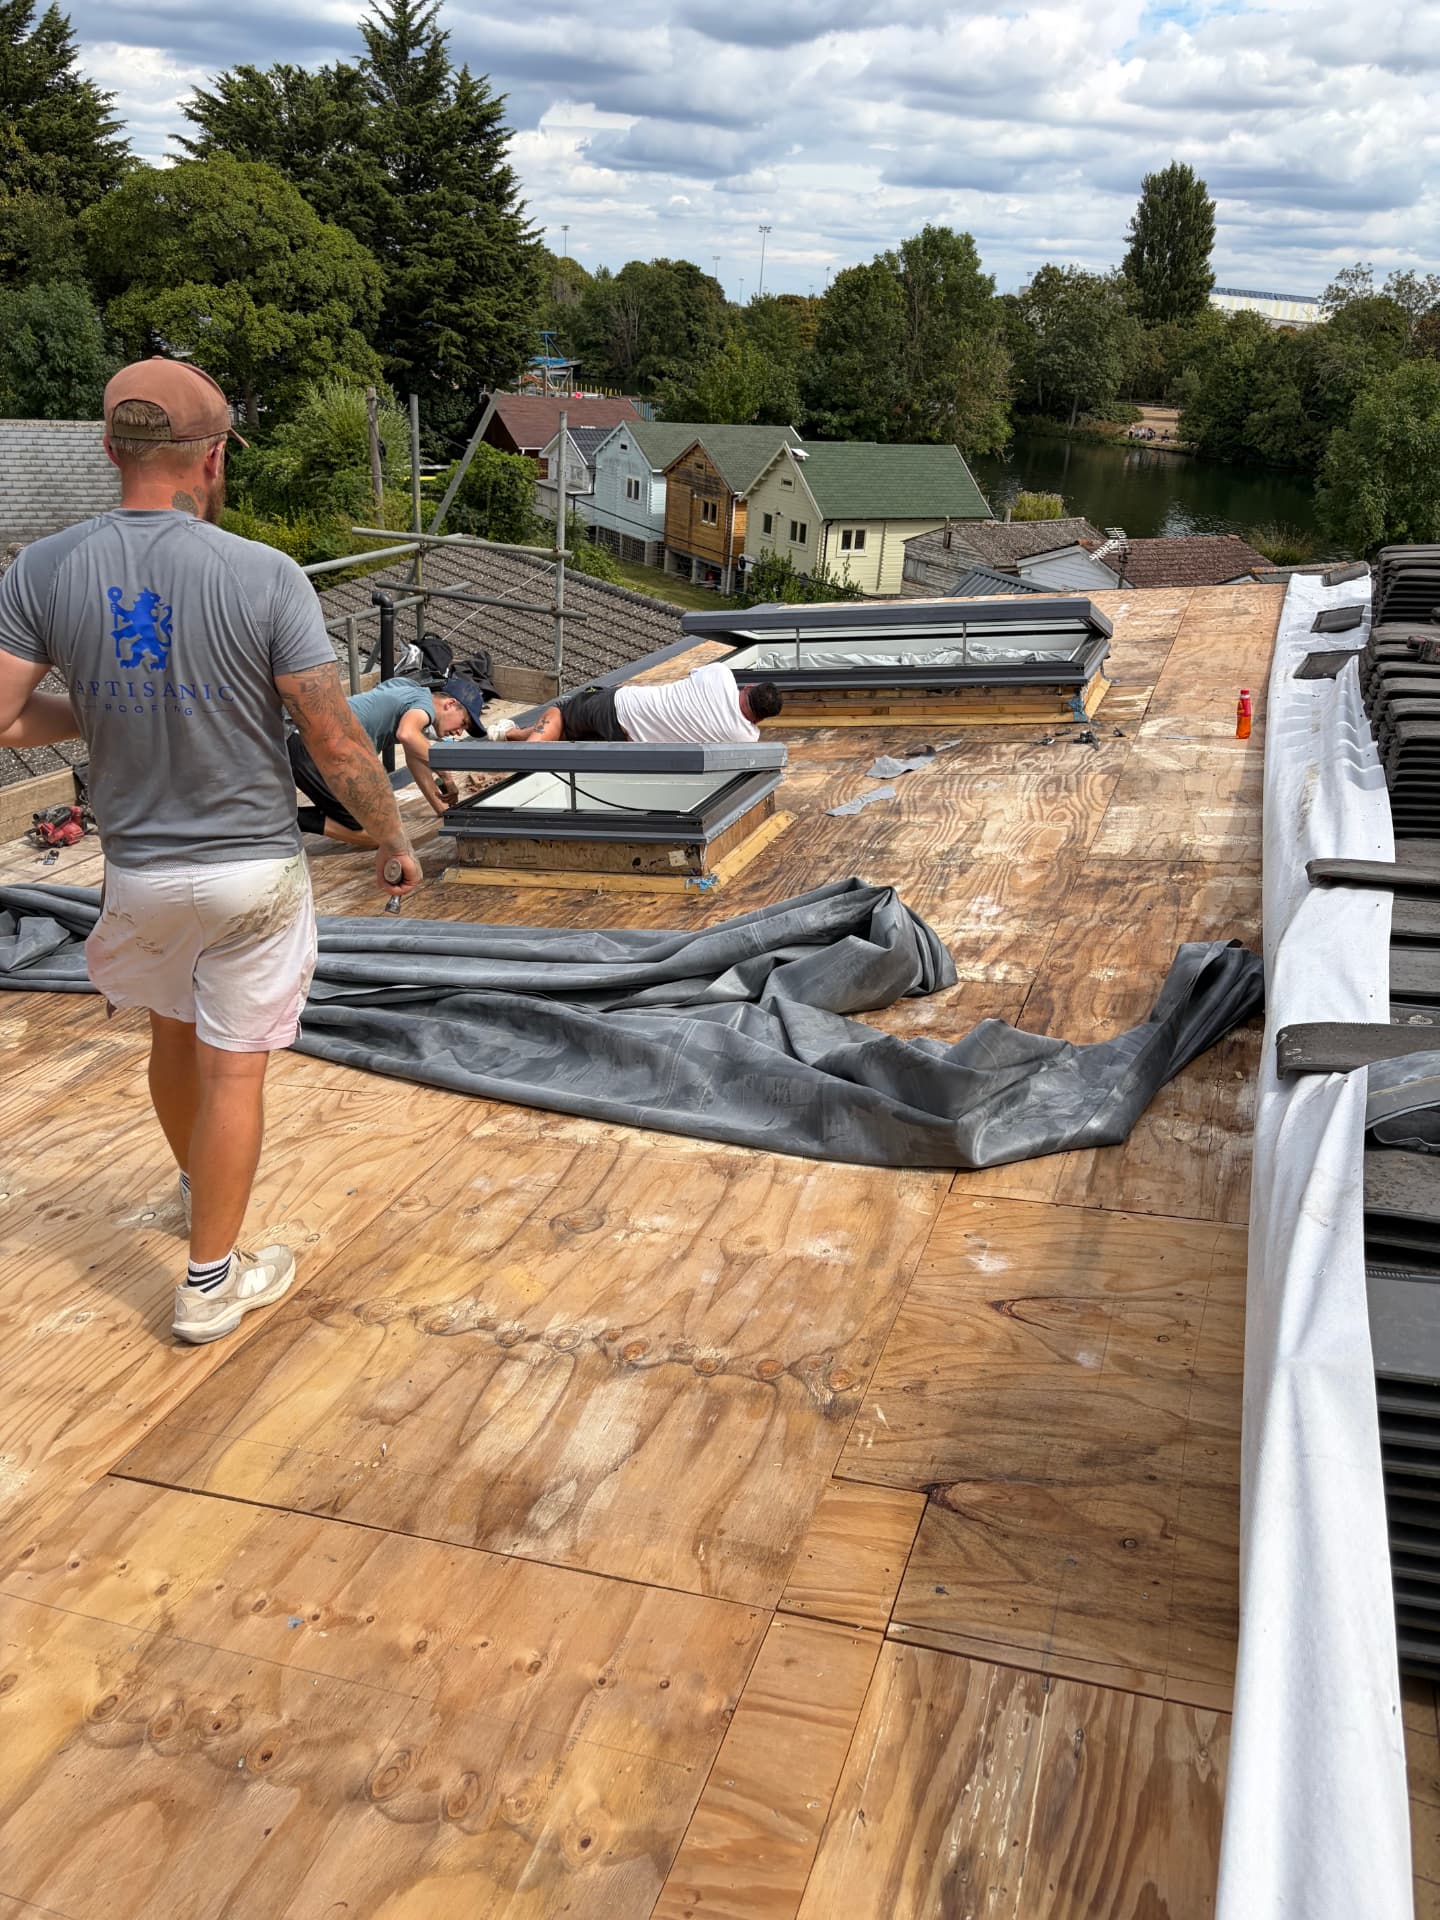
How we built it — Phase 1, strip out. All existing tiles carefully removed and stacked for re-use, along with the old felt and battens. The OSB substrate was exposed, checked over and made good ready to receive the membrane.
Phase 2 — EPDM membrane. EPDM rubber laid across the full 93m², with every edge and detail fully bonded and sealed. Then — before a single batten went back on — we carried out a rigorous hose water test across the whole roof. That's the step that matters. Once the tiles are back on, nobody can see the membrane again. The only honest way to hand a roof like this over is to prove it's watertight while you can still watch it.
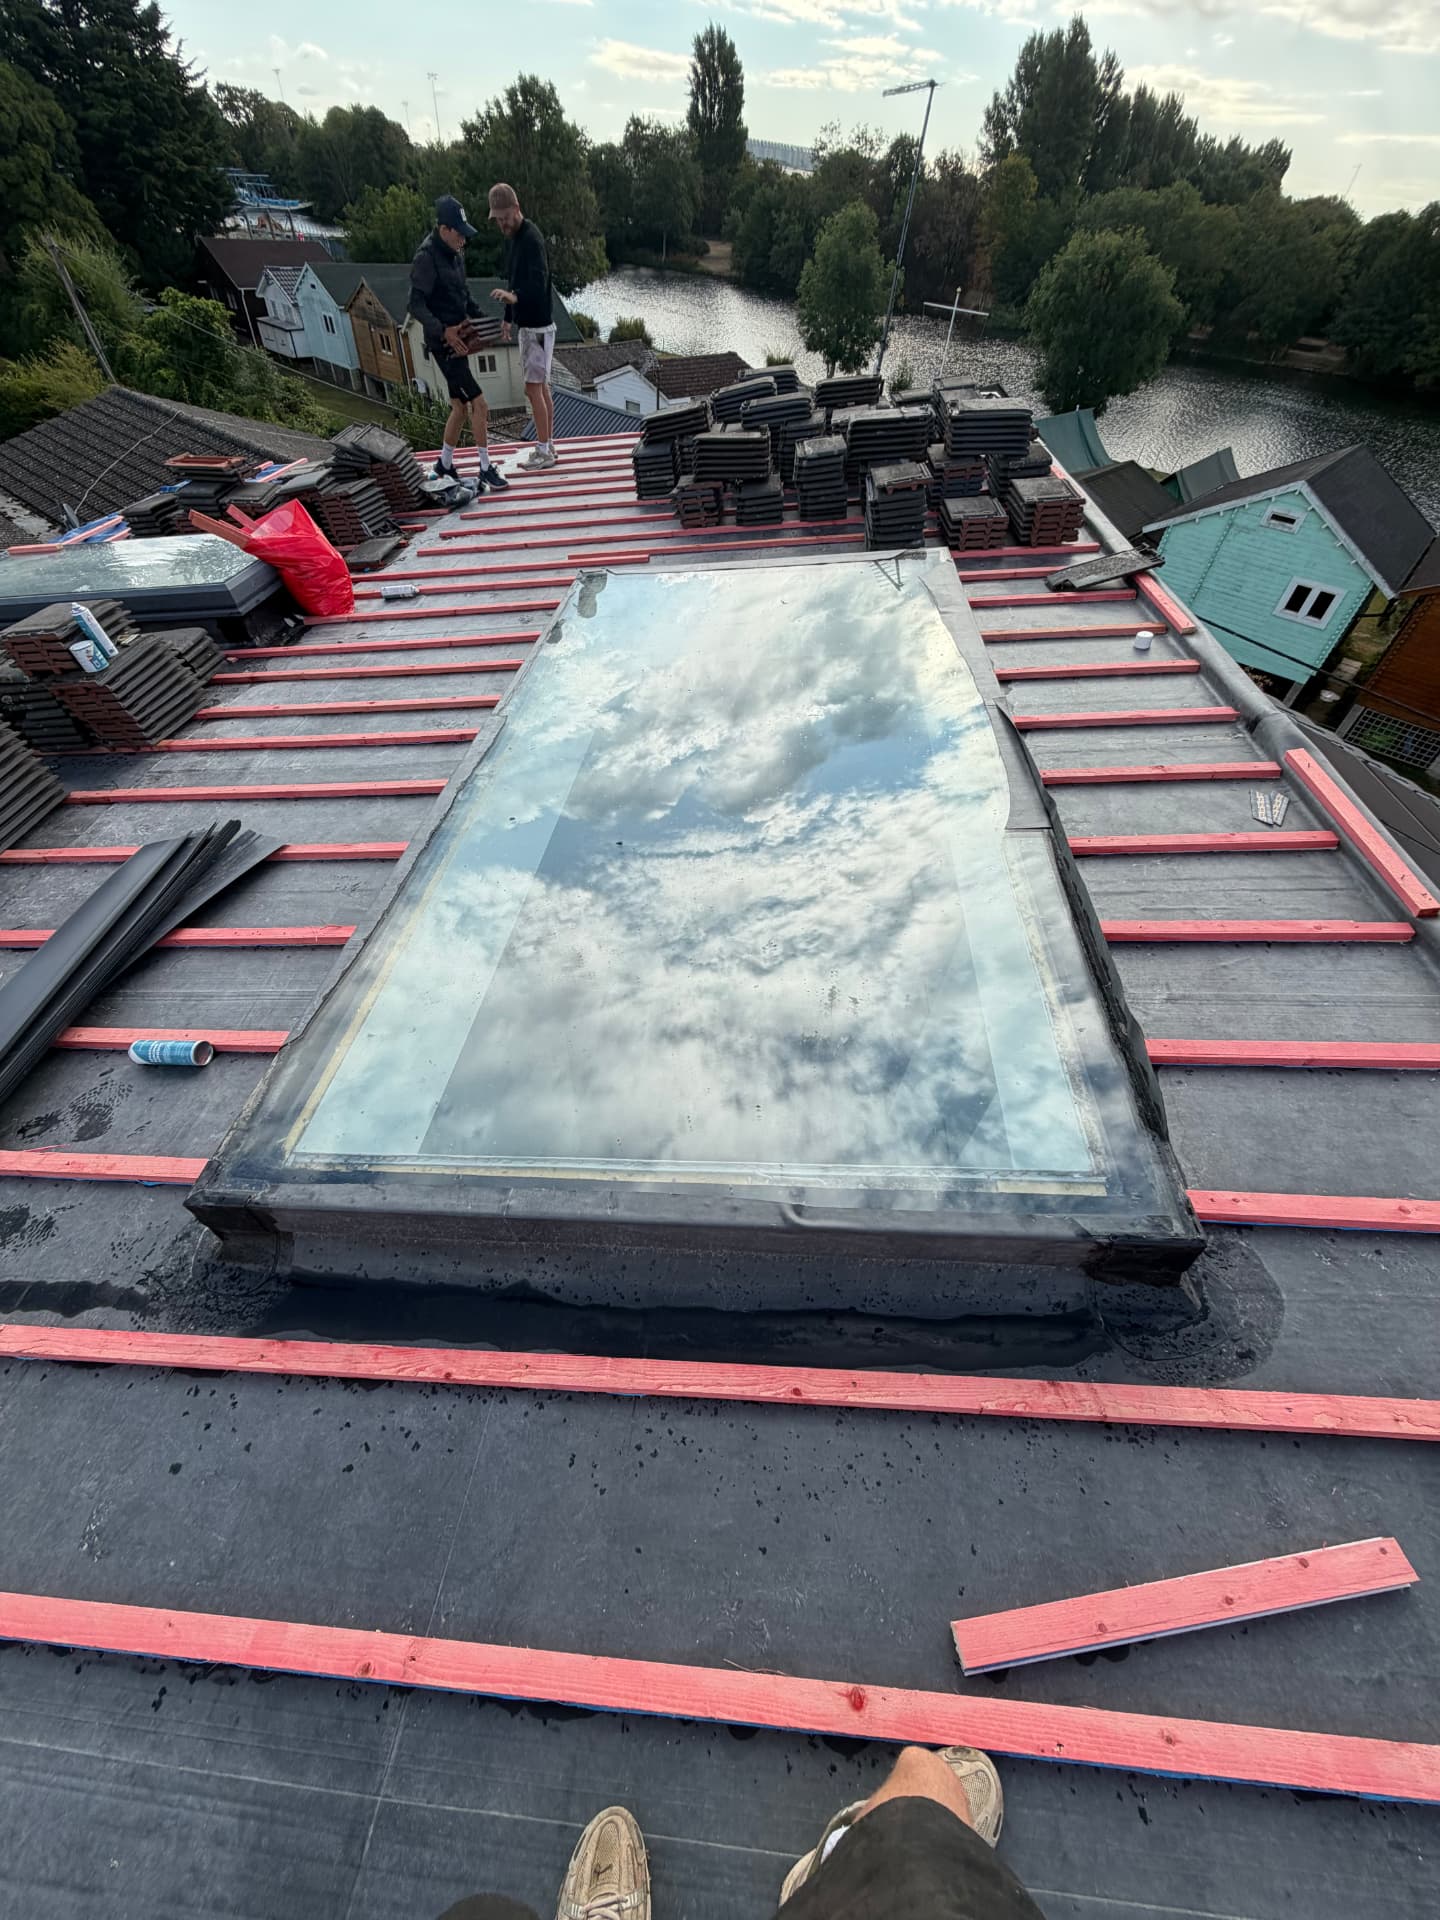
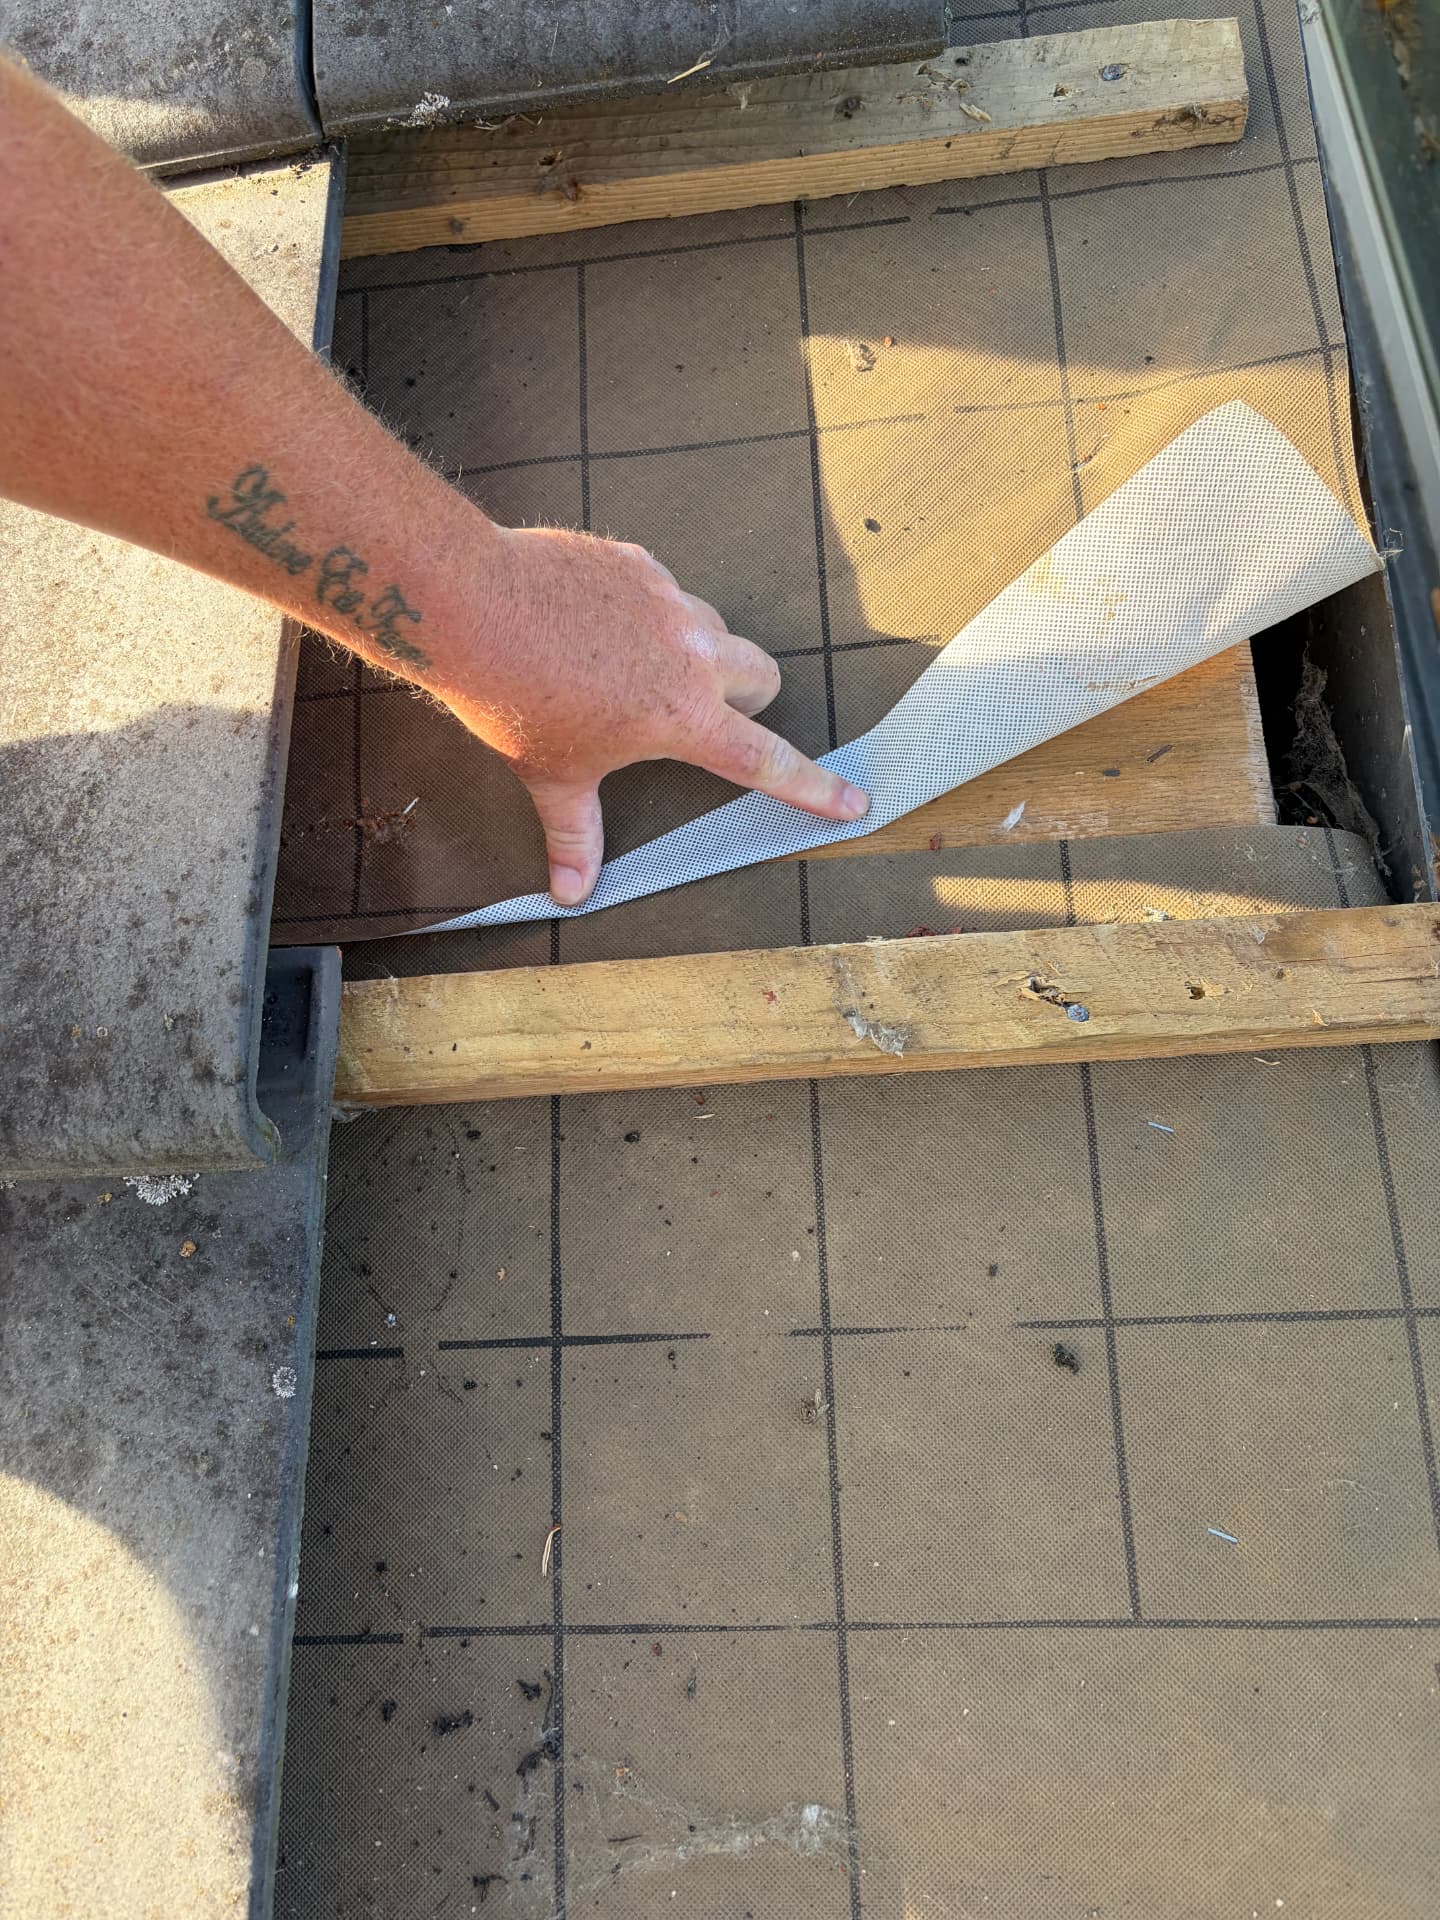
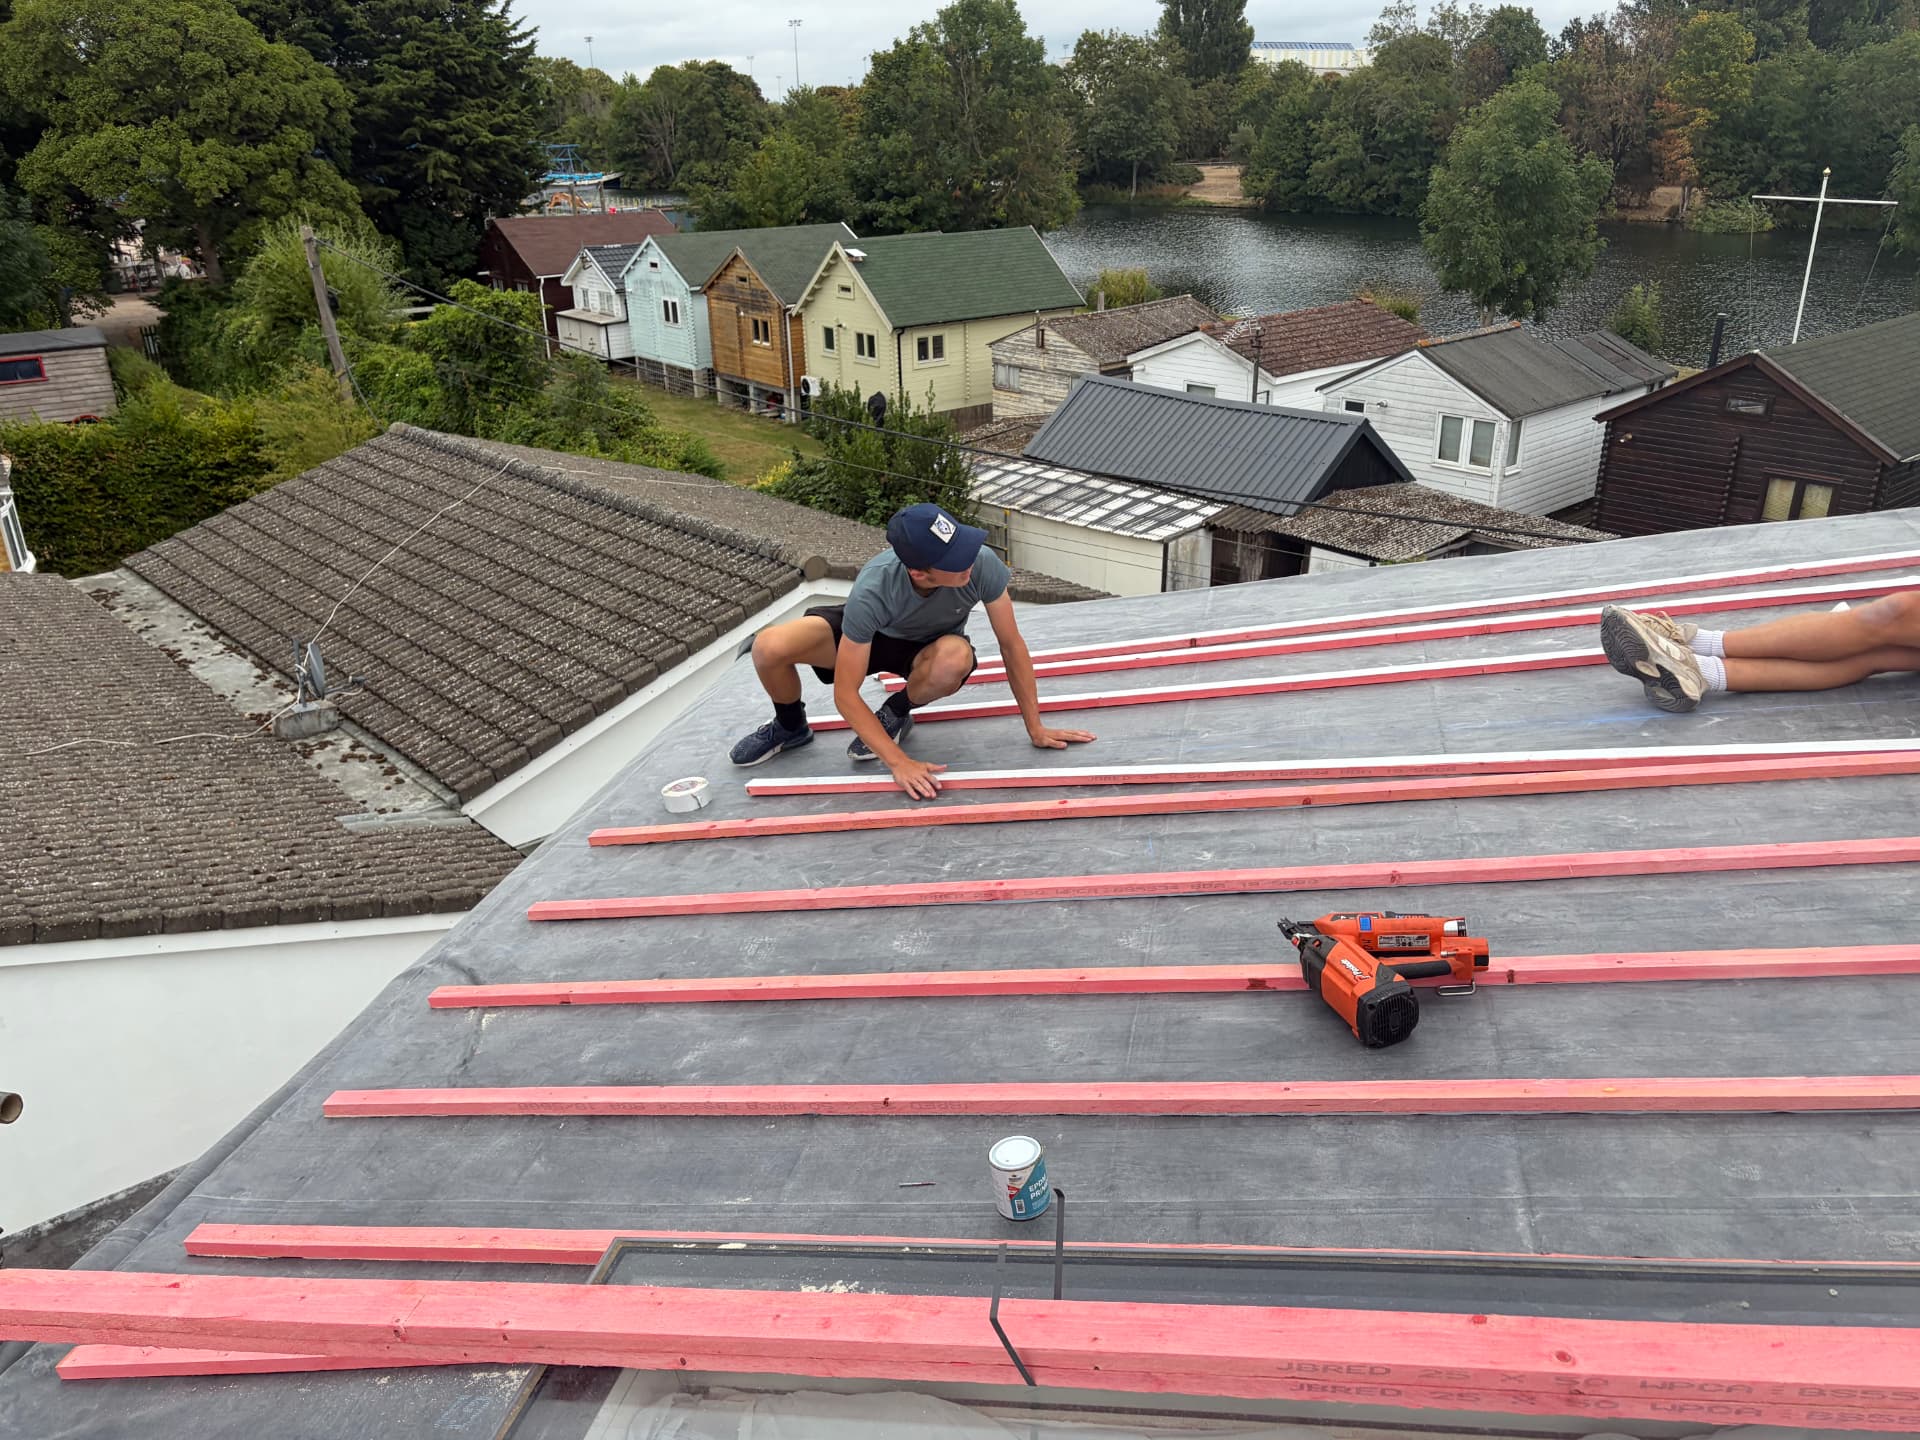
Phase 3 — butyl tape, counter battens and underlay. This is the detail that separates a proper job from a bodge. Every batten fixed through the membrane is, technically, a hole in your waterproof layer. Fix a couple of hundred nails through fresh EPDM and you've just perforated the thing you paid for. So butyl nail sealing tape was laid on top of the EPDM along every rafter line before the counter battens went down. The tape seals around the shank of each fixing as it's driven.
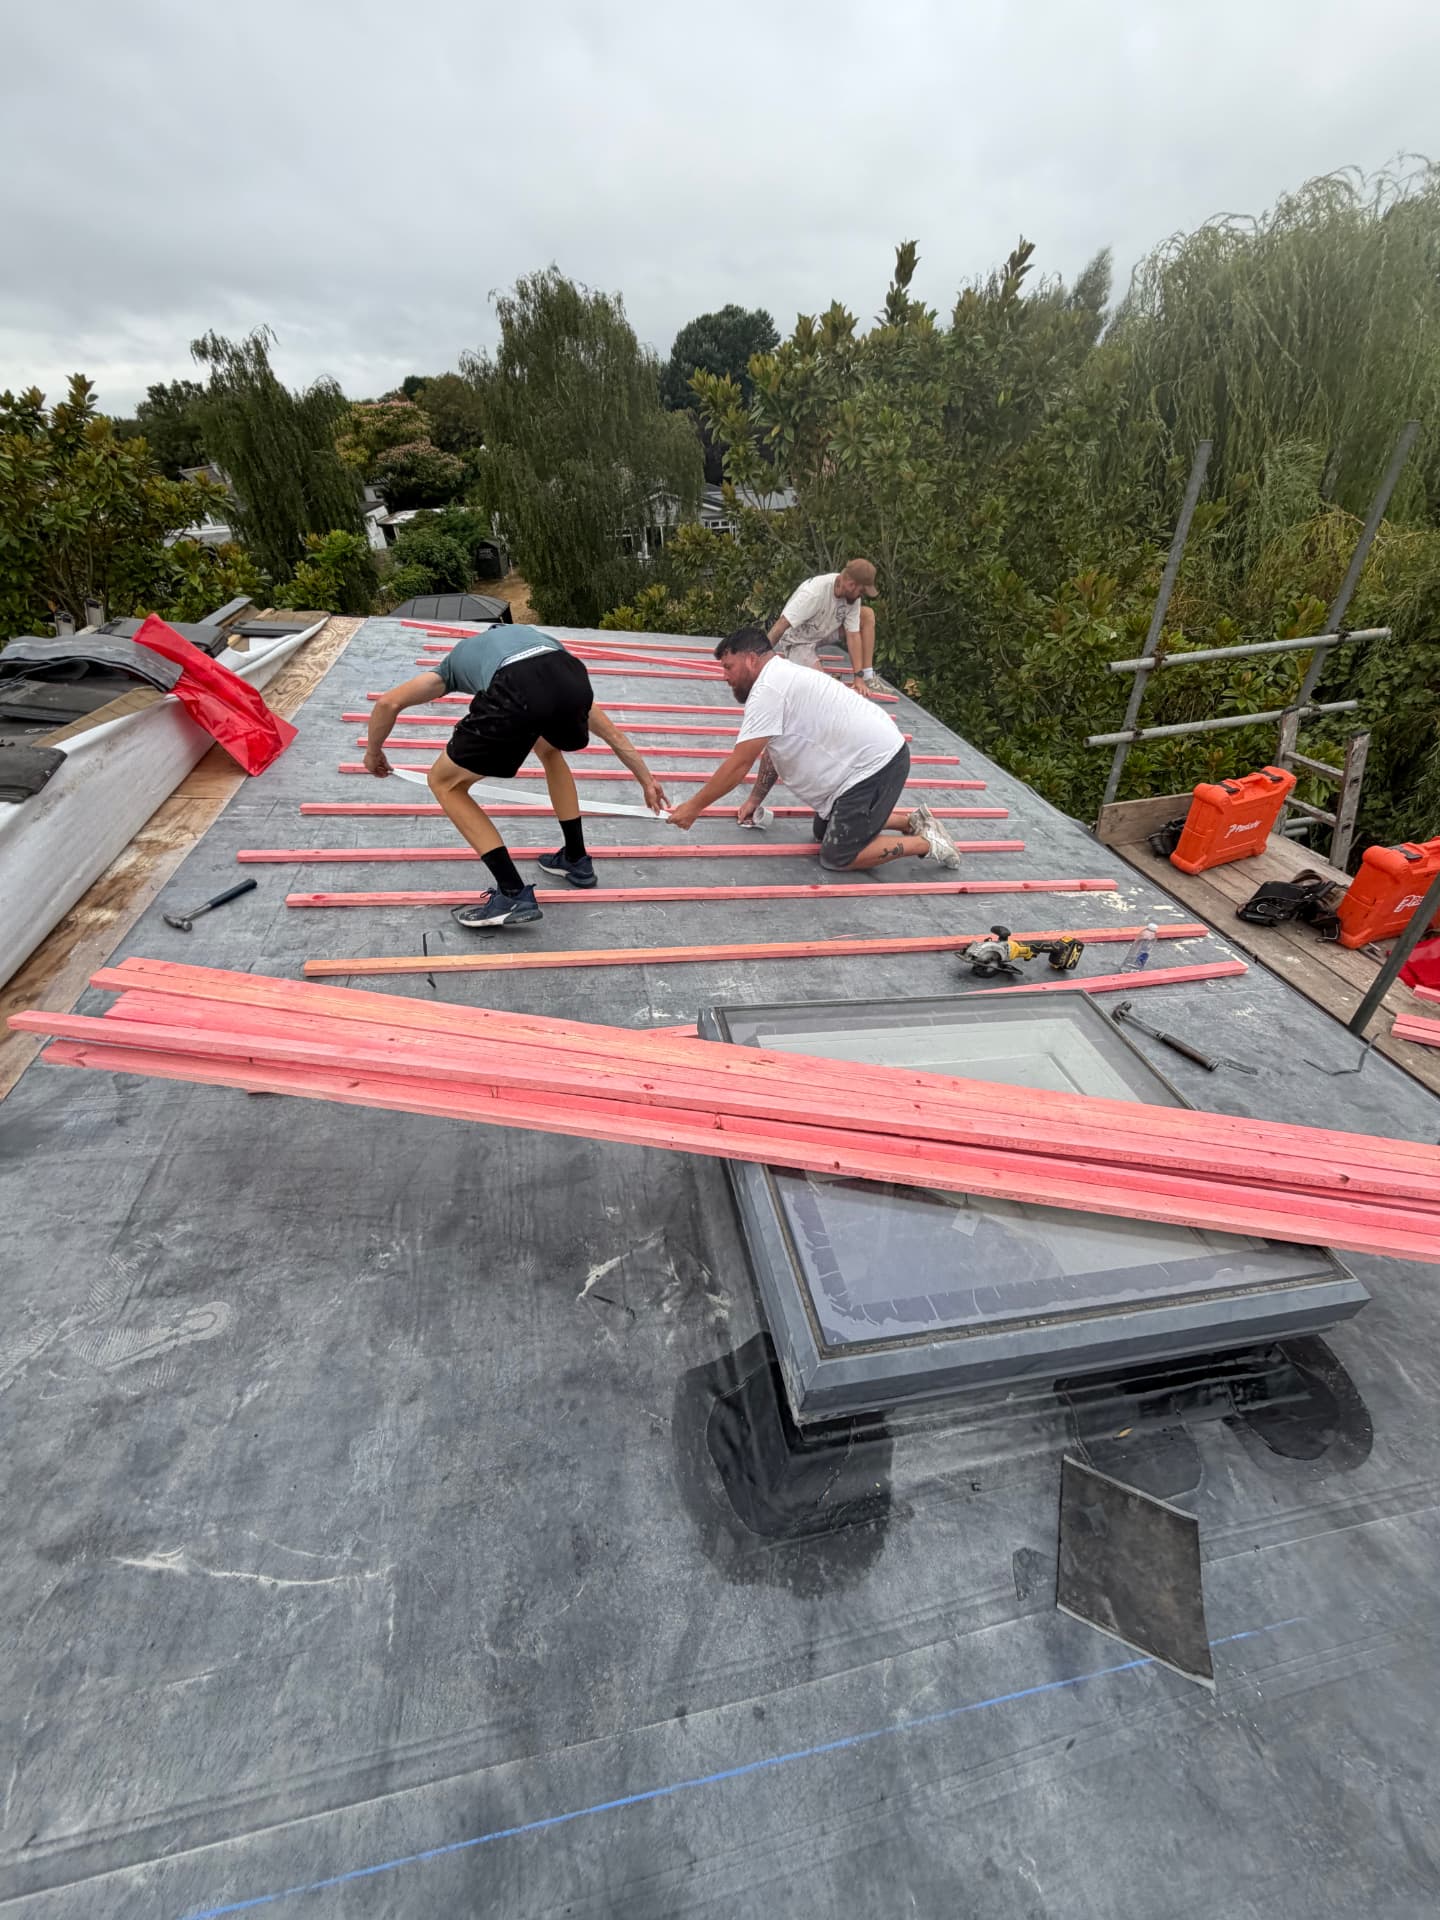
Counter battens were fitted over the tape, and Permo Extreme 200 felt installed to manufacturer spec — draped between the counter battens rather than pulled tight, so any water that gets past the tiles drains freely down the roof instead of being dammed up behind the horizontal battens. Treated 25x50 battens followed to receive the tiles.
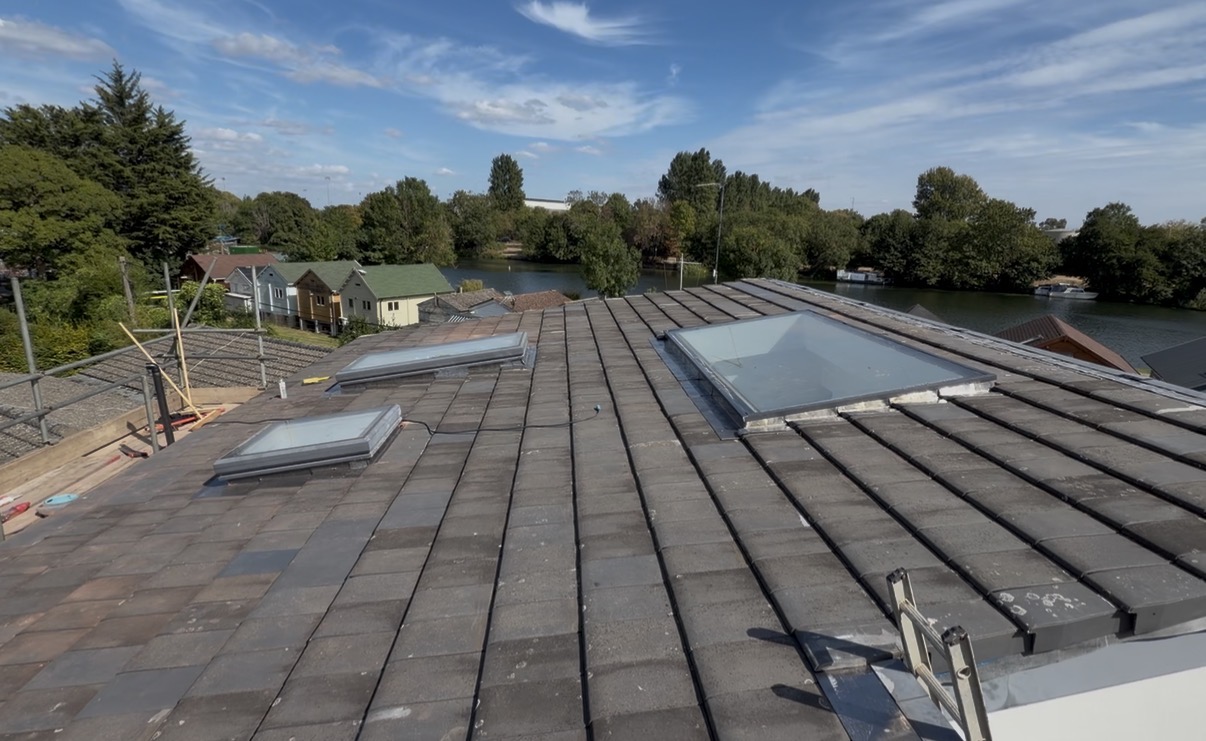
Phase 4 — re-tile and lead work. The original tiles went back on to manufacturer specification, mechanically fixed throughout — every tile clipped. On a shallow, exposed, riverside roof with open water on one side and nothing to break the wind, that's the correct spec, not overkill.
All lead work in Code 4, completed as the tiling progressed. New timber back gutter supports — there was nothing at all supporting the existing lead, it was sitting on fresh air. New Code 4 back gutters, sized properly; the originals were badly undersized. The run was long enough to require a lead expansion joint — lead moves with temperature, and a gutter formed in one continuous length will crack and split at the fixings. Splitting the run with a properly formed joint lets the lead move as it's designed to.
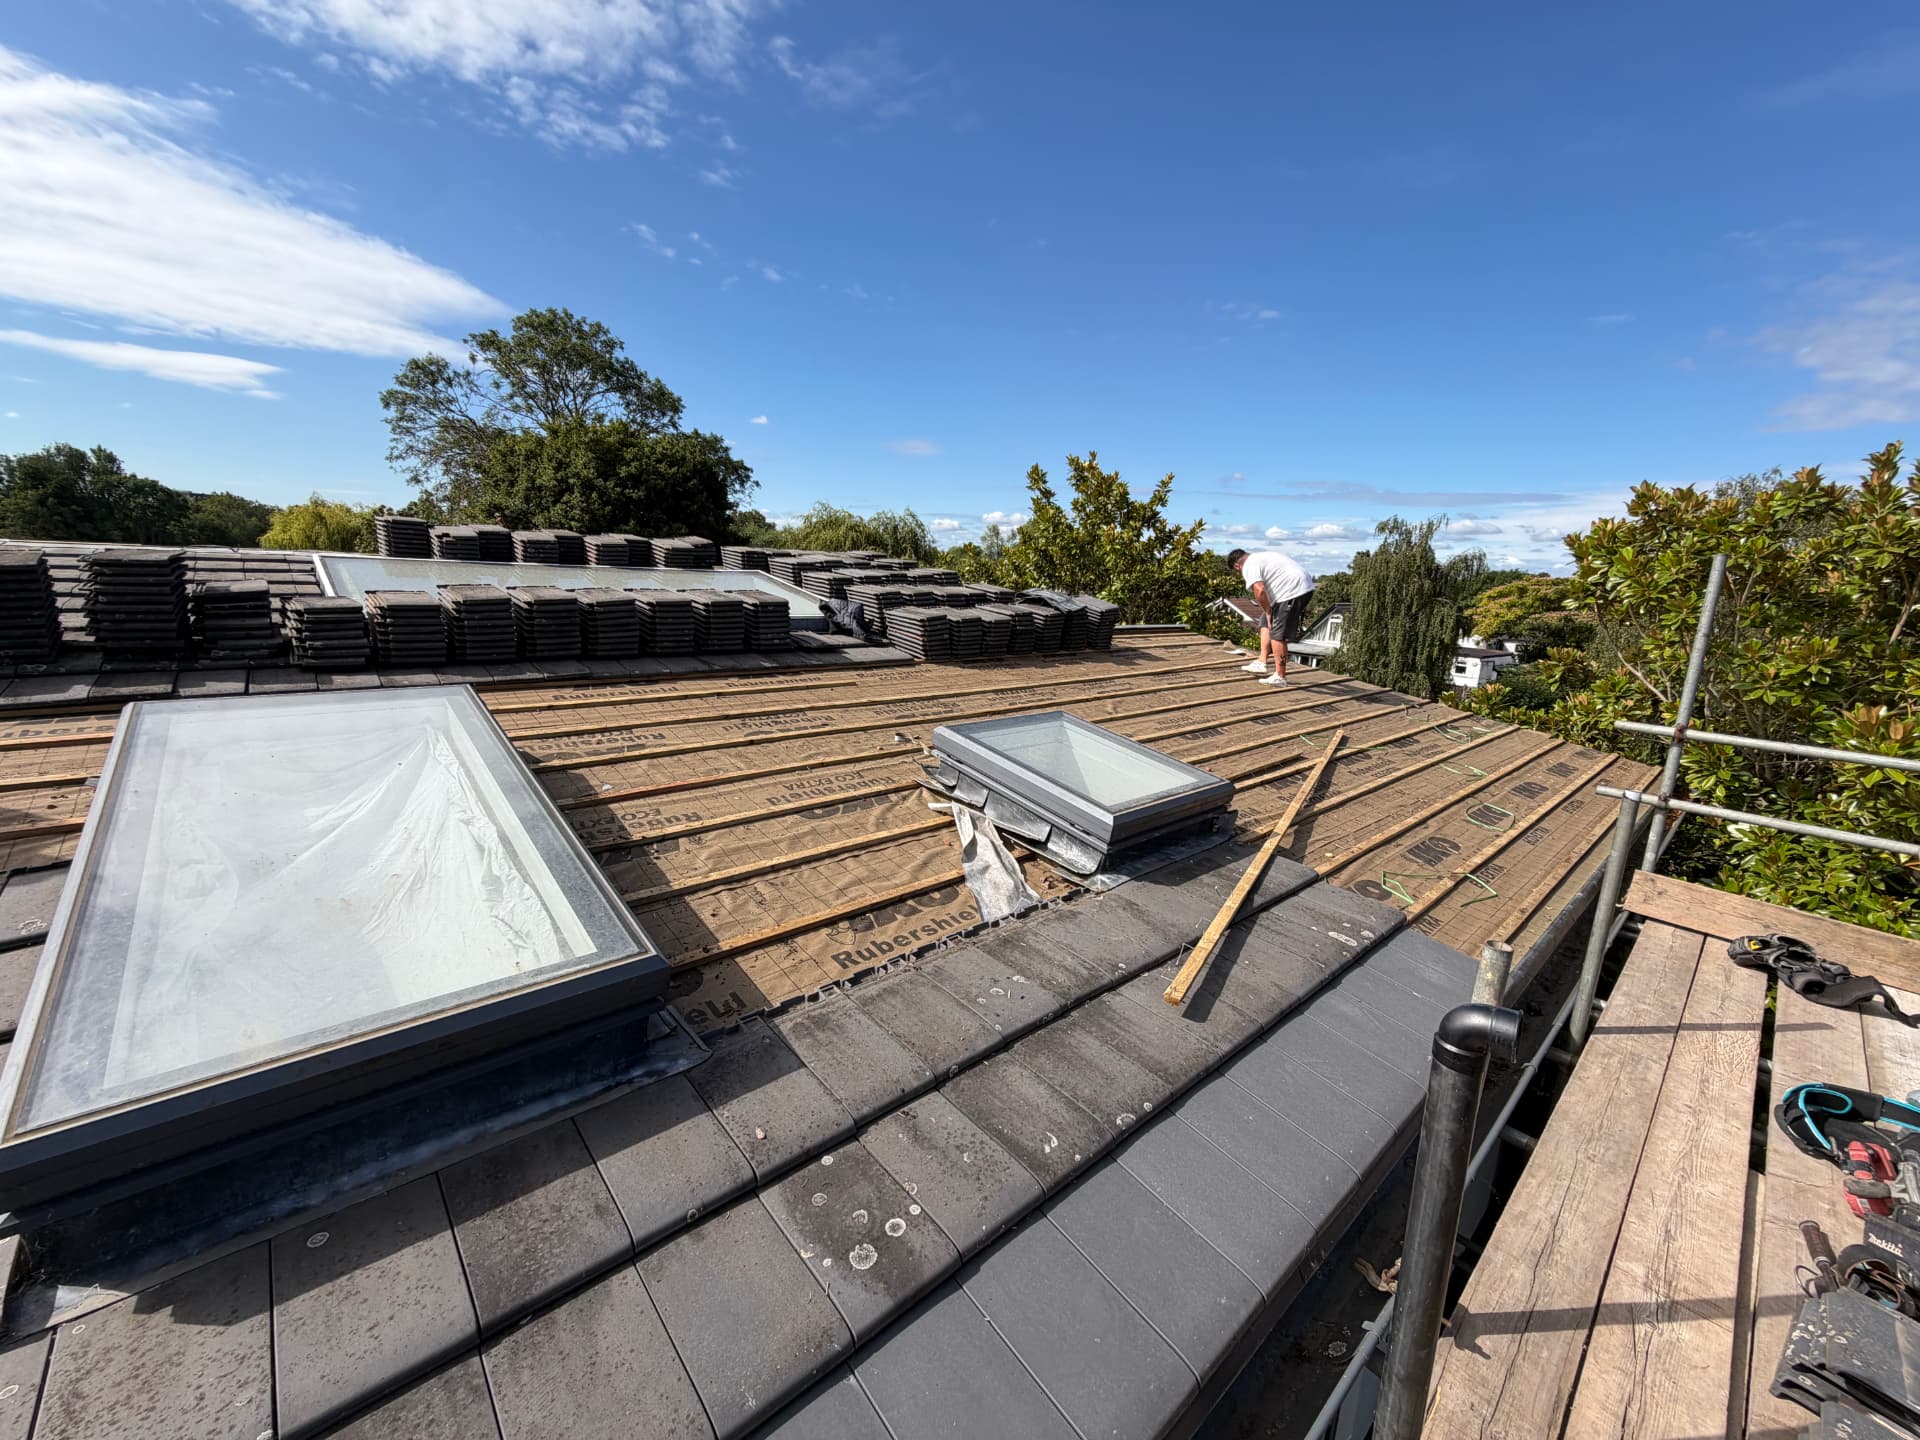
Front aprons at a minimum 150mm coverage, replacing aprons that didn't come close. Re-specified Code 4 soakers, sitting on top of the tiles, extending 150mm either side with properly formed upstands, dressed in situ — the existing ones were both undersized and in the wrong position. 600mm Code 4 capping over the laps and at the head of the roof for additional weather protection, plus full lead detailing around all rooflights as the work progressed.
The bit that doesn't show in the photos. The house sits on stilts over the riverbank, and the scaffold was standing on timber decking rather than solid ground. Which meant we couldn't load the scaffold out with tiles. A roof's worth of concrete interlockings is a serious weight, and we weren't putting that load onto a client's deck when we hadn't specified it and couldn't see what was underneath.
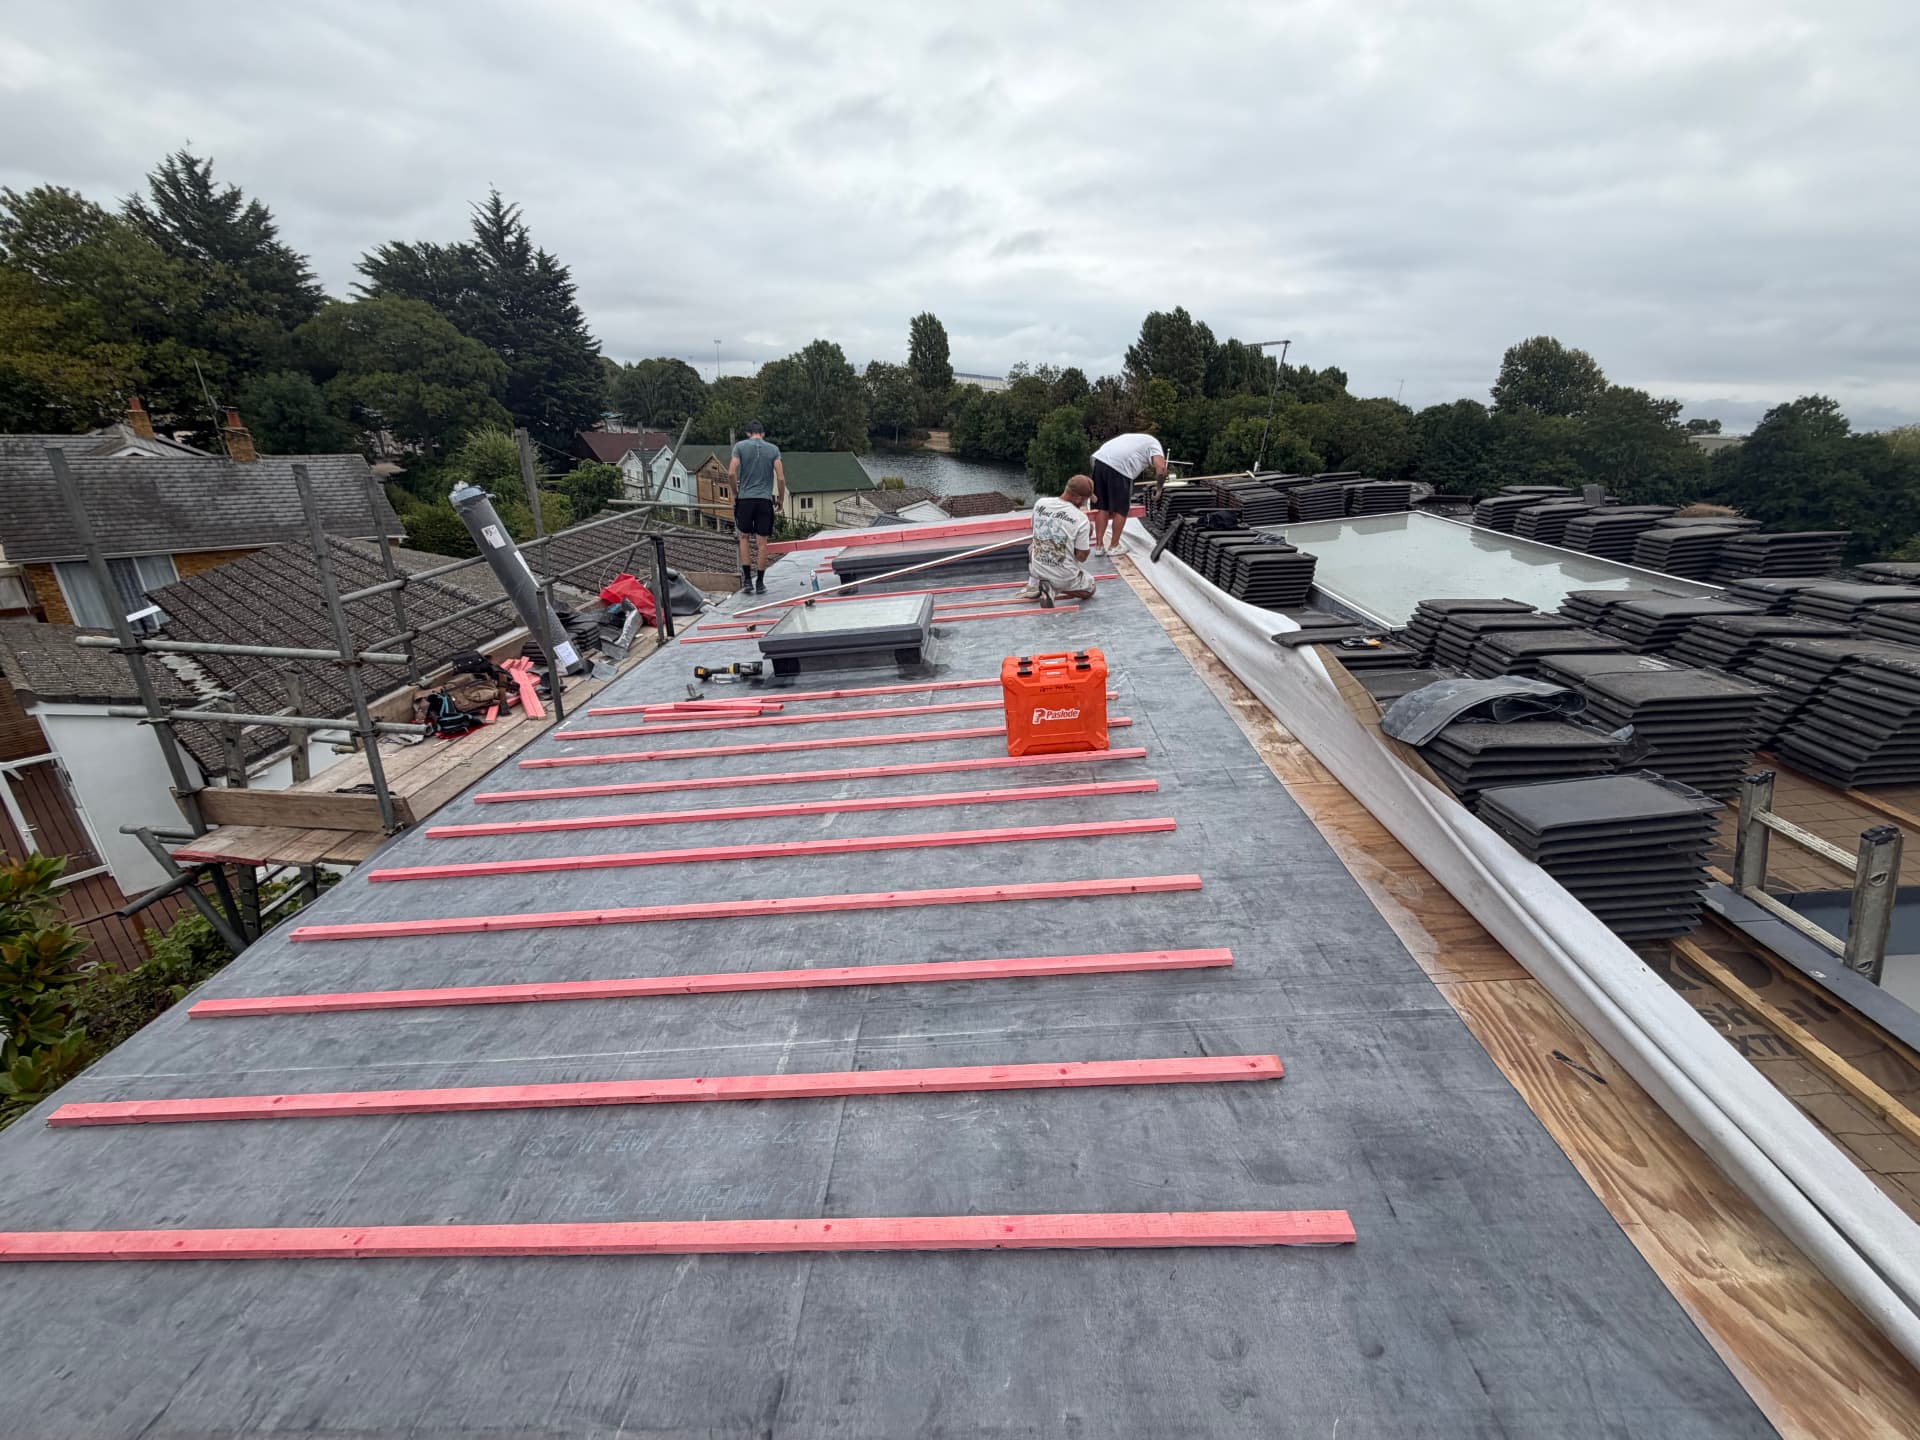
So the tiles moved by hand. We stripped half the roof at a time, worked the covering across in sections, and shifted the tiles up and along in stages as we went. Those tiles were handled several times over before they were finally clipped down. It's slower, it's harder work and it earns you nothing extra — but the alternative was risking damage to the property or working off a platform we weren't confident in. That's the sort of decision that gets made quietly on site, and it's usually the difference between a job that goes well and one that goes wrong.
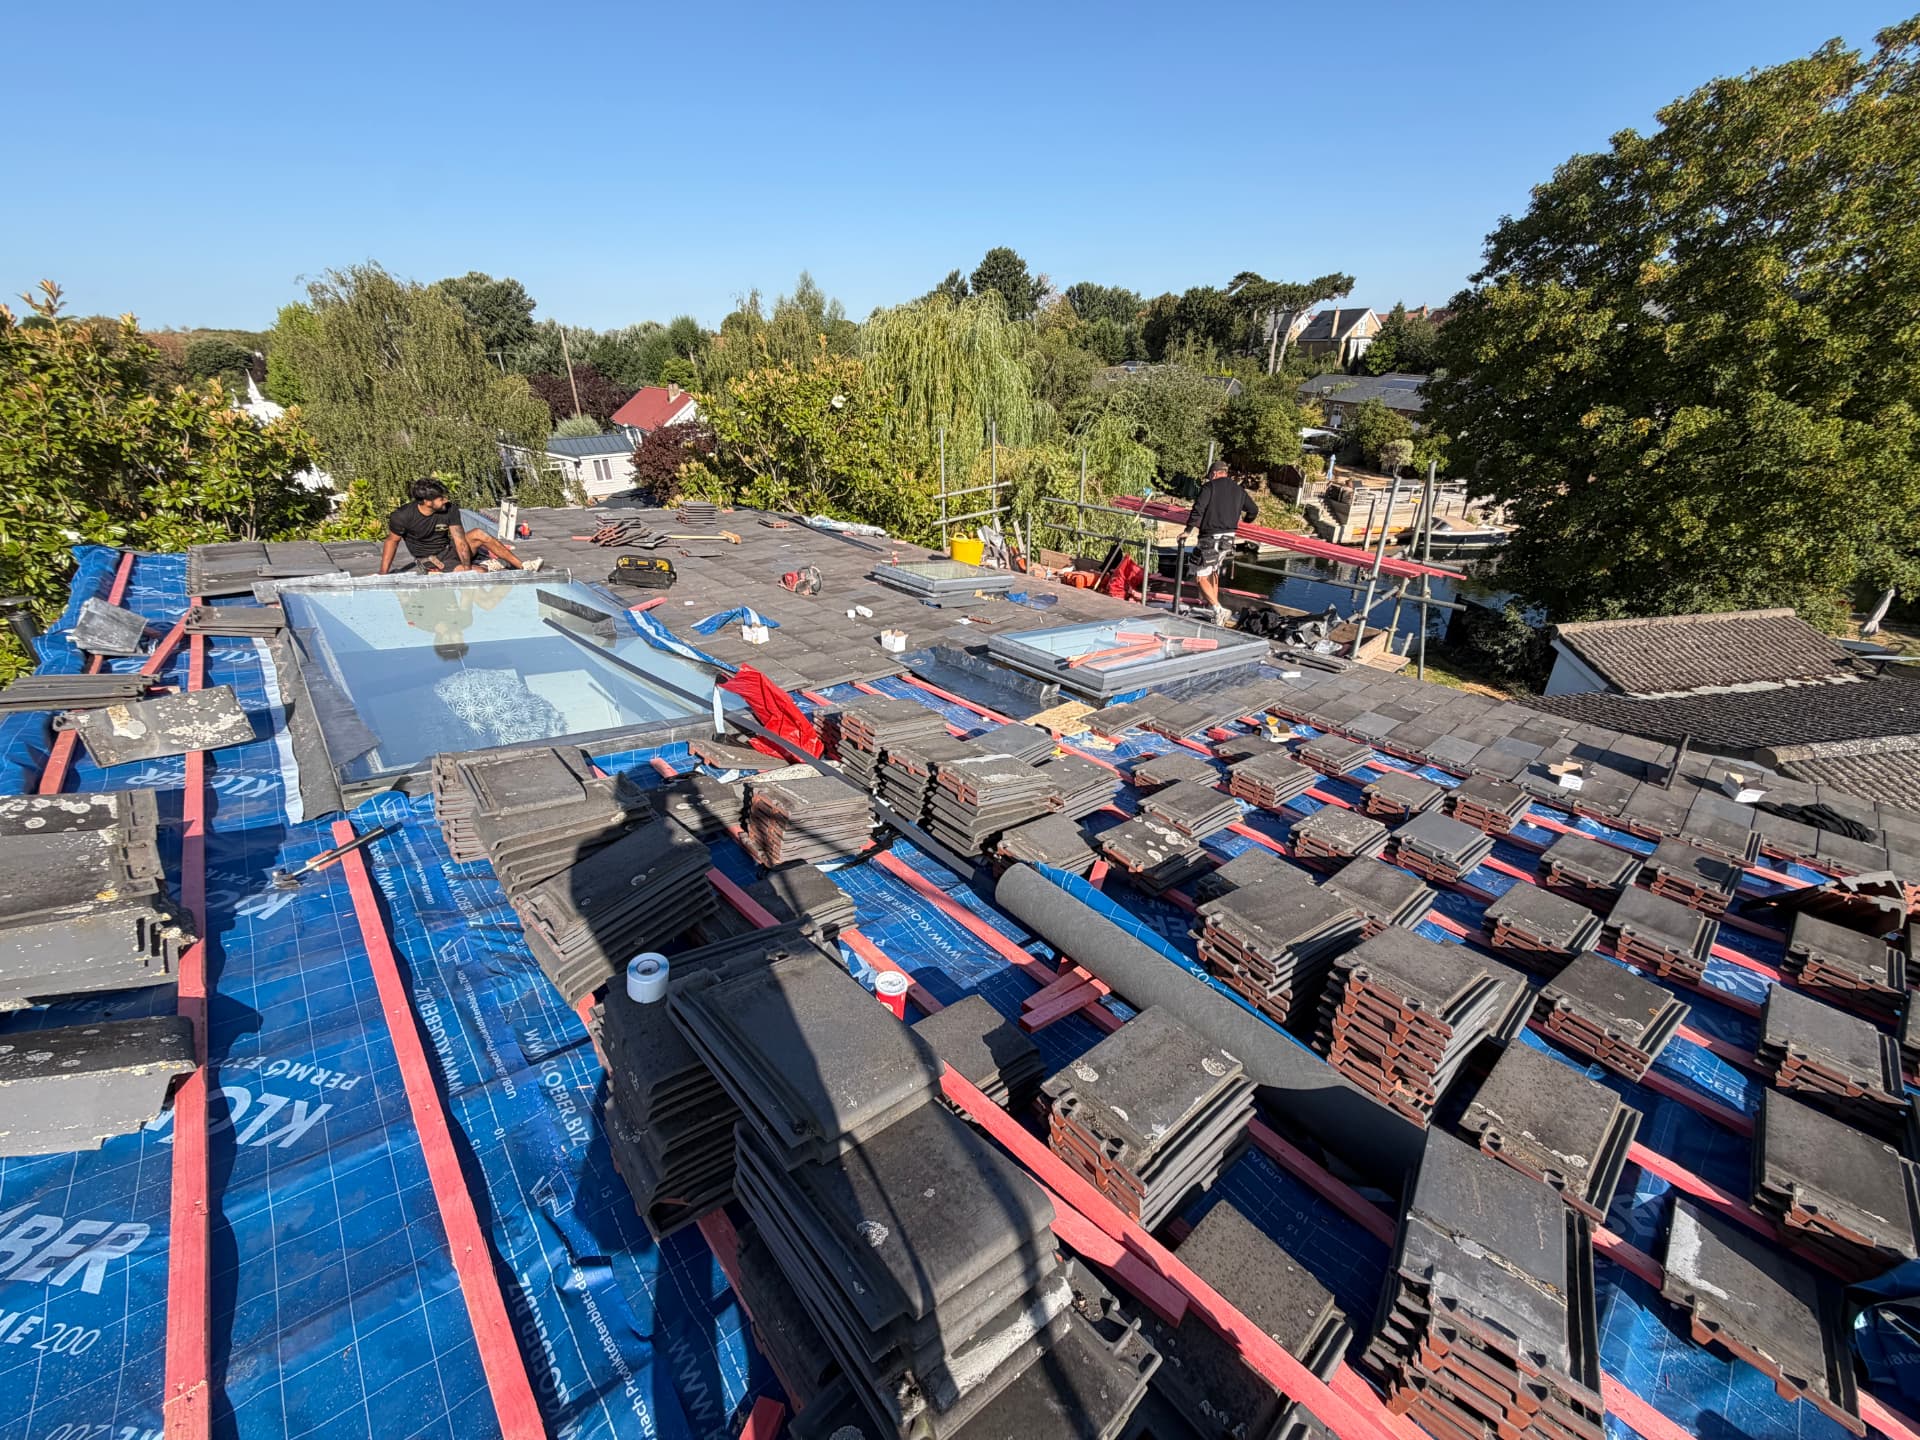
Why it matters. A tiled roof under 10 degrees will probably be fine for a while. It will also, eventually, leak. Building a proven waterproof membrane underneath removes that uncertainty completely: sealed batten fixings, correctly draped underlay, Code 4 lead detailing at every junction, a clip on every tile — and a hose test on record before any of it was covered up.
More materials, more labour, more days on site. Also a roof that will still be doing its job in thirty years.
Got a low-pitch or complex roof? Artisanic Roofing covers Berkshire, Surrey and the wider South East — pitched, flat, heritage and commercial. Full EPDM replacements carry a 20-year guarantee, backed by an Insurance Backed Guarantee.
Need expert advice on your roof?
Book a free no-obligation survey with our qualified team.
Book a Free Survey